This section describes how to create segments/filters for use in the Choice Simulator when it is integrated within a Lighthouse Studio project (typical usage).
Let's assume you are conducting a CBC, ACBC, CVA, or ACA conjoint analysis study within Lighthouse Studio. Let's further assume you have asked a number of additional questions outside of the conjoint questions, including CompanySize.
By default, any categorical variables (e.g. Select-question data) within your Lighthouse study are automatically available as Segments and any numeric variables (e.g. numeric, constant sum) are automatically available as Weights.
Let's assume you want to create a segmentation/filter variable based on CompanySize (originally asked as a numeric question where the respondents typed an integer) with the following three categories:
SmallFirm |
1 to 50 employees |
MediumFirm |
51 to 500 employees |
LargeFirm |
501+ employees |
1.From the main Lighthouse Studio menu (exit the Choice Simulator if you have launched the simulator), select Analysis | Filters.... The Filters dialog is displayed.
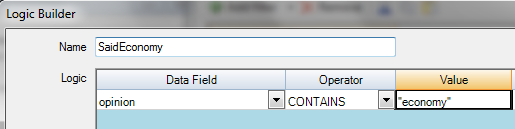
2.Click Add filter | Logic Builder - Create filter using basic logic builder. Type "SmallFirm" for the filter name (no spaces, underscores, or special characters are permitted for filter names). Using the drop-down controls, specify the logic for SmallFirm:
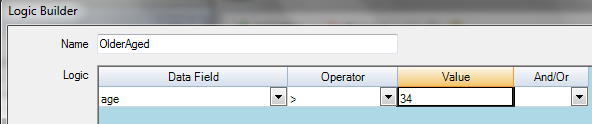
Click OK to save the SmallFirm filter definition. Click Add filter again to create the other two filter definitions for MediumFirm and LargeFirm. You will need to use the AND logic for the MediumFirm filter:
3. Click Analysis | Segments and Weights... The Segments and Weights dialog is displayed. Click Add Segment. Specify a name for the segmentation variable such as CoSizeSegment. Use the drop-down controls to select the filter names you previously defined as categories of this new segmentation variable. To add another category to the table, use the Add Row ![]() icon. When you're done, it should look like:
icon. When you're done, it should look like:
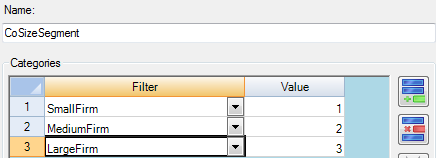
Click OK to save your new segmentation variable.
4. Now, launch the Choice Simulator by clicking Analysis | Choice Simulator. Assuming you've already added market scenarios, click the My Scenario Settings tab above the toolbar. Select the Segments icon in the Segmentation group on the toolbar. You now see that CoSizeSegment is available as a segmentation variable. Click which segments to include in your analysis.
Results for all respondents and respondents belonging to each of the three company size categories are broken out in different columns of the report.
Creating Segments via the Data Management Dialog
You may also create segments for use in the Choice simulator via the Data Management dialog. From the main Lighthouse Studio dialog (exit the Choice Simulator if you have launched the simulator) click File | Data Management...
There are three different ways to create a segmentation variable for use in the choice simulator from the Data Management area:
1. From the Get Data tab, you can Merge external data from a .csv file. Let's assume you created a .CSV file containing sys_RespNum in the first field followed by another segmentation variable called MySegVar in the second field categorized into 3 different categories. The first row must contain labels. Respondent number must be named sys_RespNum. Variable names must not begin with numbers or contain spaces.
Make sure to set the Data Type to Categorical if you want to use the merged variable as a segmentation variable in the choice simulator. When the merge wizard prompts you to do so, type the three labels to associate with the three categories of CompanySize: "SmallFirm," "MediumFirm," and "LargeFirm."
2. From the the View/Edit Data tab, you can click the Add Segment icon ![]() to create a new segmentation variable and select the filters that describe the logic that assigns respondents into the categories of your segmentation variable. If the filters do not exist yet, you can create new filters by clicking the Manage Filters... button. (This process is nearly identical to the procedure described above in the previous section 2.)
to create a new segmentation variable and select the filters that describe the logic that assigns respondents into the categories of your segmentation variable. If the filters do not exist yet, you can create new filters by clicking the Manage Filters... button. (This process is nearly identical to the procedure described above in the previous section 2.)
3. You can add a new variable (to be used as a segmentation variable in the choice simulator) using the Add Column icon ![]() . Make sure the Data Type is Categorical. A new blank column is appended to the data table. Making sure that your data match the respondent case id order in the data table, you can paste your data into the blank column from another software program such as Excel.
. Make sure the Data Type is Categorical. A new blank column is appended to the data table. Making sure that your data match the respondent case id order in the data table, you can paste your data into the blank column from another software program such as Excel.